Saturday, 25 July 2020

Butterflies card

I picked up my craft magazines again this afternoon and i decided to check my box of dies to see if I could try it. It's fair to say my collection of dies is quite small but I did find a couple of stencils which game me an idea - no Pinterest required this week!

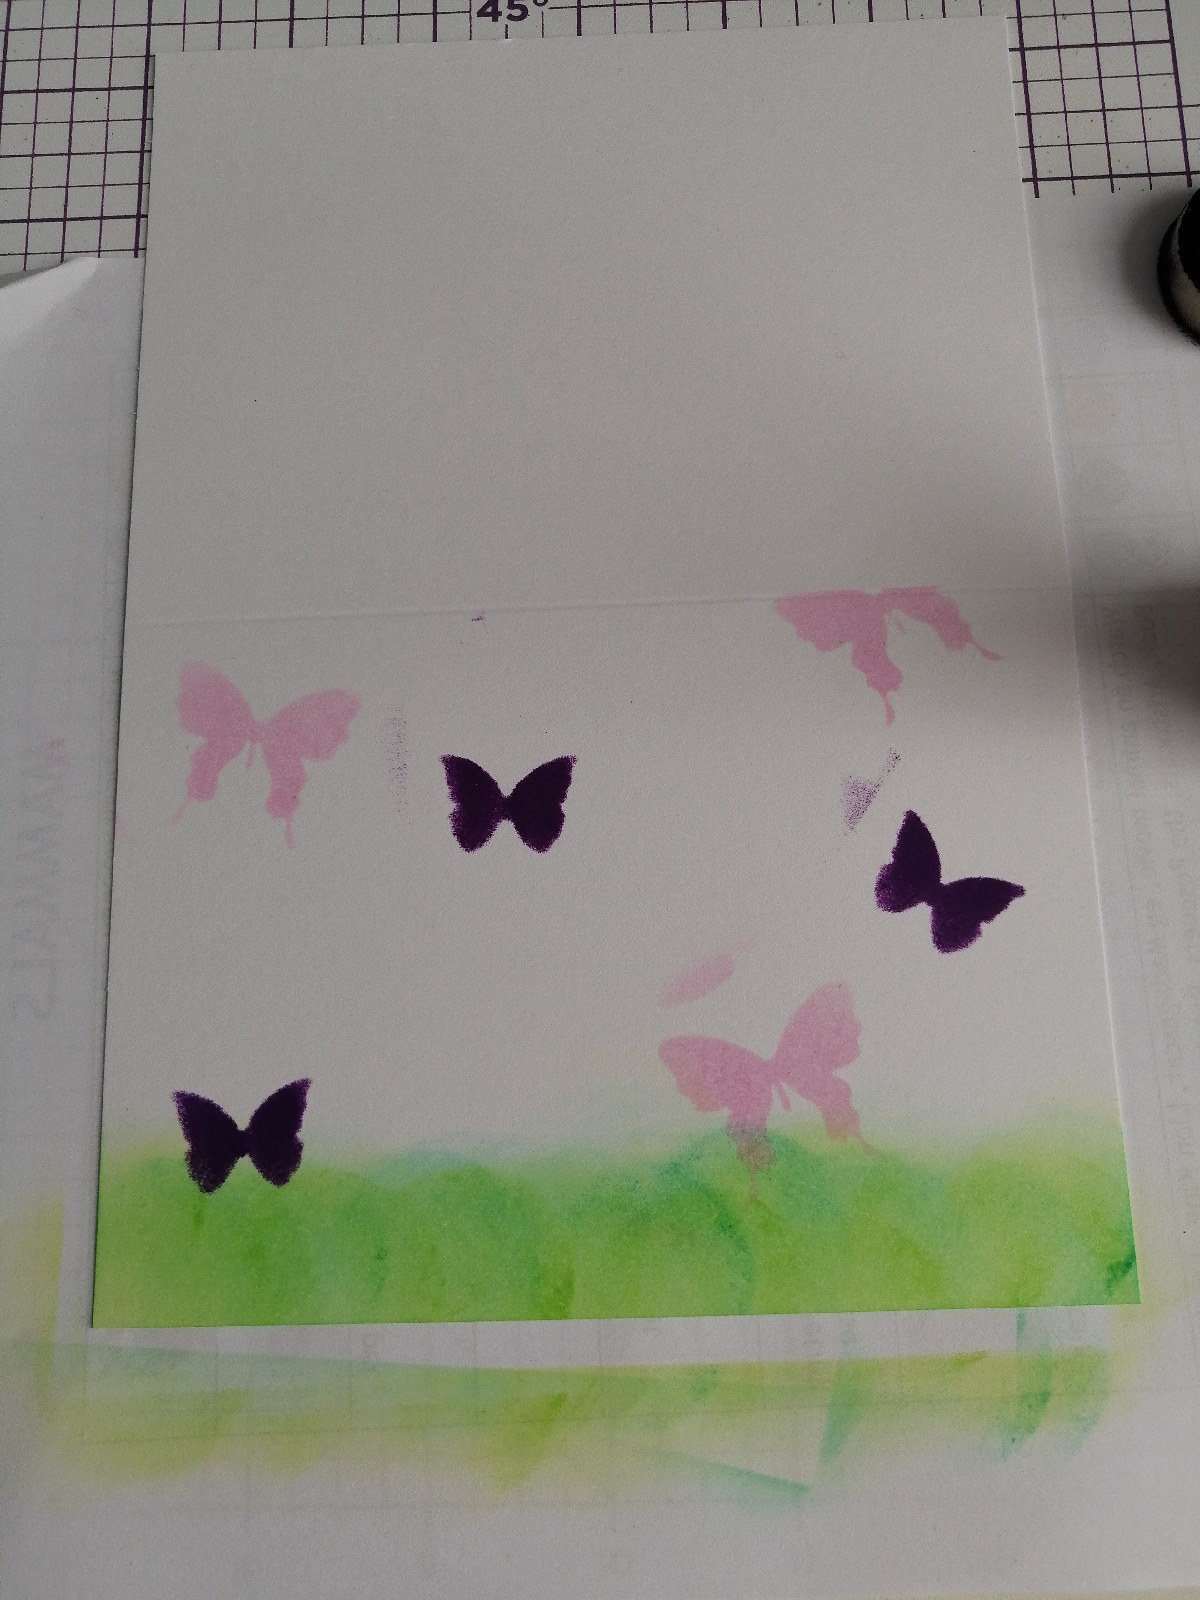
I started off with a card, scrap paper, an ink blending tool and two different shades of green ink. First I put the card landscape over the scrap paper (to avoid any ink on the table!) and began by putting a layer of light green ink along the bottom, partially going off the edge of the card - I dabbed it on first to get as much ink off the sponge before rubbing along so all white space was covered. Next I took a darker green and repeated the process to layer the two shades together. This gave me a nice edge which had a grassy look to it.

Now for the stencil. I have one with multiple butterfly shapes and sizes on it so I decided to use two of these along with two more colours of ink - pink and purple. I placed the stencil in position and used the blending tool (with a fresh sponge for each colour) to apply first the purple butterflies and then the pink. I added 3 of each colour, spaced all over the card. I even have one flying off the top edge of the card, to do this I put the scrap paper along the fold so that the ink didn't spread and the edge stayed neat. Now as this is the first time I've used a proper stencil and needed to stay within the single space I didn't necessarily do a good job of that.

I was planning to put a sentiment of some kind on the card so I took one of my banner style stamps and on a thicker piece of white card, stamped the banner in black. I had planned to use another stamp for the sentiment but have found again I'm lacking in resources! Thank goodness for scrap paper and fairly neat writing. I added this to the card covering those main blotches of ink using double sided sticky dots to add a different layer to the card. I felt this didn't complete the card so I added a black die cut butterfly, also stick with the stick dots.


I will admit if I had planned this properly rather than taking my usual 'what does that look like' attitiude I would be even happier with the result - like the spacing of the butterflies, my ability to be tidy when using a stencil. As it is, I would still give it to a family member but I know for next time what I should or shouldn't do. Definitely a one I'll make again! 

Monday, 20 July 2020

Sunburst Style

I said I would post today and here I am! Little update on the family - rooms were rearranged again at my grandparents as we found out my grandma doesn't need a hospital bed or hoist and she is coming home tonight 😊

The card idea I saw and wanted to try out is a sunburst. I used scrap paper as I was just testing the design - I plan to make more of these for birthday cards and also in Christmas papers when I start making the Christmas cards!

First I picked a card, measured the outside so I could make a rough estimate for the size needed for the mounting card, the instructions I followed did give me sizes but as I was using a different size card I decided to go with my own measurements. Once trimmed to fit, this was set aside so I could focus on getting my sunburst pieces ready.

This time I followed the instructions and the pictures (the sizes on the instructions and the numbers according to the pictures! Cut out rectangles to the following sizes:

1 - 4 1/2" x 1 1/2"
1 - 4" x 1 1/2"
2 - 3" x 1 1/2"
2 - 2" x 1 1/2"


Take each rectangle and carefully cut across the diagonal so you end up with two triangles.


Get the mounting card/paper and decide where abouts you want the sunburst centre to be and begin to place the triangles around the outside covering all corners of the card. I found this part to be the most difficult part as my triangles kept moving around so I used a piece of white tack to both mark my centre and to loosely hold the points in place.


Once in position I decided to put a splodge of glue in the centre mark (replacing the white tack) so that I could have an anchor point for all of my triangles. I carefully raised each triangle, applied glue and stuck them down.You should have parts of the triangles hanging over the edge of the mount card. Simply flip this over and trim down to give straight sides.

Time to attach to the card! Cover the reverse of the mounting card in glue then gently position before applying pressure to stick the cards together. When this was stuck down, I needed to find something that would act as my centre spot. I have lots of little adhesive gemstones but these were too small, I had to dig out the bigger ones which usually require the glue gun. As this is a test card for me I used a glue stick which so far is holding pretty well!


Overall I'm please with the outcome, it's given me plenty of ideas for how I can adapt it with different colours, patterns and for different occasions. This is one idea which I will certainly be making more of in the future!

Sunday, 19 July 2020

Update

It's been a while since I posted. Almost 2 months 😓😶 This was something that I didn't want to happen! So whats been going on... Well for one thing, I went back to work on the 3rd June. Its been fairly non-stop - I was back in the store for the best part of 2 weeks before we opened to customers and we've introduced some new processes that I had to wrap my head around, and once the store opened some of the activities I/my team used to do have started to come back. I got back into the work routine no problem but trying to adjust/form a new weekend routine has been more of a problem than I anticipated. 

My plan was to make time to craft on a weekend, probably a Sunday afternoon but so far that hasn't happened. I got the card magazines out, searched through Pinterest to get some inspiration but was always dragged away either for something to do with the family, I didn't find anything I felt I could create, or I i distracted myself so much I lost track of time.

This weekend has been the family. Last Monday my grandma had a fall, she was determined that she was fine. (Just a little bit of background - my grandma has alzheimers and motor neurons disease so her memory is very spotty, she has no speech now (mainly noises), and her mobility has decreased over the past few months - she's had a few falls including one only a week or so before this one where she had to go to A&E as the cut on her head was pretty deep luckily it didn't need stitches but a plaster was put on so she knew that something had happened.) Long store short she wasn't fine and has been in hospital since Tuesday. My parents, my auntie and myself have spent pretty much the whole weekend with my grandad preparing his house so that we can get my grandma home. The dining room was turned into living room #2, the living room was rearranged to become a half living room, half bedroom - my grandma is going to be getting a hospital bed and a hoist for support getting in and out, and my grandad now has a single bed which we brought downstairs so he can sleep in the same room with her. Its been a hard weekend, my grandad has been so strong about the whole situation and it's been hard to hear him on the phone to my grandma/the nurses looking after her trying not to show how upset he is but we can tell how much its breaking his heart being away from her.

With any luck the hospital bed will arrive tomorrow and my grandma can go home.

On the flip side, I finally found a card design I wanted to test out, I did that just before writing this post so I will upload the photos and write about it tomorrow!